Wednesday, April 30, 2014

Make It Market Shakers & Sprinkles kit...

The NEW! Shakers + Sprinkles Kit designed by Betsy Veldman exclusively for Papertrey Ink is full of specialty items that will instantly give you a boutique feel as soon as you open your box! This collection gives you everything you need to create incredible shaker elements for your paper crafting projects! From a HUGE set of dies, to a clever sentiment stamp set, not to mention TEN different types of "sprinkles" to fill your shakers and special foam adhesive sheets that make the construction EASY, you will LOVE everything you get to work with! The best part about this kit is that over half the value is invested in exclusive tools which can be used again and again, even after you have used all of the expendable items! 
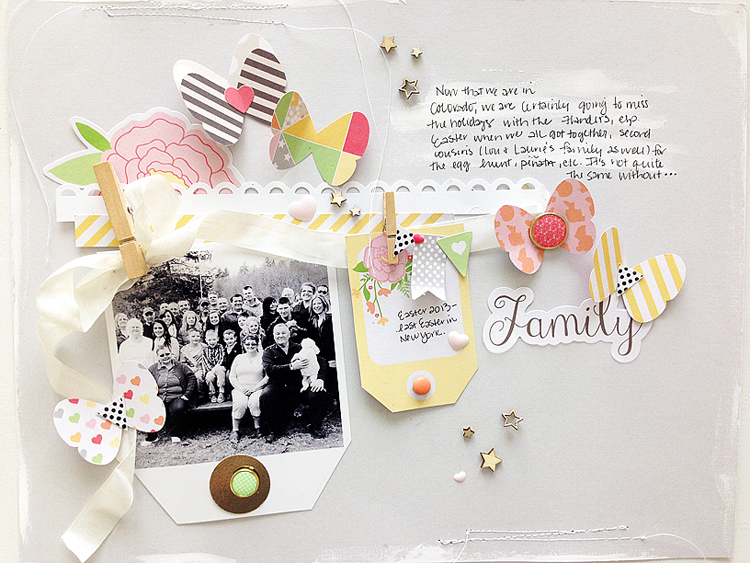
(Cards by me.)

Here is a quick look at the contents of this amazing kit:

Shakers + Sprinkles stamp set
Shakers + Sprinkles: Rectangle die collection
Shakers + Sprinkles: Oval die collection
Shakers + Sprinkles: Heart die collection
Shakers + Sprinkles paper pad
3- Double sided 8-1/2" x 11" foam adhesive sheets
2- 8-1/2" x 11" Clear Cardstock sheets
4- Glassine envelopes
Test tube & cork w/Fake Sprinkles shaker filler
Test tube & cork w/Fake Sugar shaker filler
Test tube & cork w/Chunky Gold Glass Glitter shaker filler
Test tube & cork w/Silver Star Sequins shaker filler
Test tube & cork w/Pink Sequin Mix 
Test tube & cork w/Turquoise Sequin Mix shaker filler
Test tube & cork w/Orange Sequin Mix shaker filler
Test tube & cork w/Yellow Flower Sequin Mix shaker filler
Test tube & cork w/Chartreuse Sequin Mix shaker filler
Test tube & cork w/Heart Confetti Mix shaker filler
Test tube storage box


The total retail cost of this kit is $90. There will be a limited number of these exclusive kits available and once they sell out, they will never be available again! The Shakers + Sprinkles Kit will be available for sale beginning on May 1st at 10pm EST, only at Papertrey Ink. Read all the details on Nichole's blog or contact Customer Service with any questions.


Here are 4 cards I made with the kit!

"Sprinkles on Top" card:
This card began with a paper from the kit that already had the saying printed on it. I wanted to add the "sprinkles" title over the top to create a shadow effect, so I created a shaker box with the frame dies, sticky foam and acetate from the kit and added some sprinkles inside.

The little hearts are cut with one of the nested dies. I layered the title over the acetate, off-setting it a bit for a shadow effect with Aqua Mist cardstock. I actually made a mistake with the large frame...when I placed it down, I accidentally covered up the H from "happy birthday". So instead of starting all over, I fixed it by stamping "happy birthday" on white cardstock with stamps in the kit and placing it on top. :)
(This card is my daughter's favorite!)
And the little flower sprinkles come in the kit too. With the kit, you get 10 test tubes of sprinkles in a pretty box! Isn't that the coolest?


"You Scatter Happiness" card:
I used one of the papers in the kit as my background again and stamped "wherever you go" in Lavender Moon ink and "you" and "happiness" in Raspberry Fizz ink. (Stamps in kit)

To create the glittery heart, I die cut it from white cardstock, backed it with the thick sticky foam paper and trimmed around it. (The adhesive is still sticky where the hearts are open.) Then I stuck the "Scatter" die cut word onto the top. Last, I used the clear glitter in the test tubes and sprinkled a little bit on over the top, pressing it into the open hearts. The foam paper is SUPER sticky, so it works great for glitter! The glitter will stick where the sticky foam paper is showing! (Centers of hearts)

"Sprinkled With Love" card:
I didn't realize the next two cards were so similar, but I'll share them anyway in case you'd like more ideas. One is a shaker card, and the other is a flat card using the same dies, different sprinkles. First is the flat one. Pretty self explanatory, I just cut the shapes out with the dies, stamped the saying and added star sprinkles.

Notice how I wrapped the title around the orange frame before I adhered it! I love little details like this.

I backed this card with a Harvest Gold card base.
"Sprinkled" Shaker card:
Another one made with the heart dies, but this time I turned it into a shaker and placed the heart on its side.


The kit will be for sale 5/1 at 10pm EST at Papertrey Ink! Grab one while they are available, once sold out, they are gone forever.
Visit the Make It Market gals to see more shakers and sprinkles! Betsy VeldmanDawn McVeyHeather NicholsMelissa PhillipsNichole Heady.

Monday, April 28, 2014

A sneakie peekie...

Papertrey Ink has another card kit coming soon designed by Betsy Veldman, and I've been playing around with it...I can tell you it's colorful and full of possibilities! There are so many different ways you'll be able to use these dies and stamps. You'll love this!
Now if I am correct (and if I haven't lost any on my table among my mess), I've counted 12 dies in this kit. TWELVE! This is just a little sneak, but there is soooo much more! I'll be back on Wednesday to show you what I've been up to, and the kit itself will be available at Papertrey Ink at 10pm EST on May 1st. :)

Wednesday, April 23, 2014

You know me and butterflies...

We go waaaay back. :) I love them!

They really do work for so many different occasions. This one is an Extra Large Butterfly Punch by Stampin' Up! and works for dressing up an Easter layout.
One last project for Chickaniddy Crafts this month. I had fun with their Twirly Girly line! Here I wanted to use the springy colors for an Easter layout. I incorporated the "family" sticker into my journaling. It reads,
"Now that we are in Colorado, 
we are certainly going to miss the holidays with the Flanders,
esp. Easter when we all got together, second cousins 
(Lou and Laurie's family as well) for the egg hunt, pinata, etc. 
It's not quite the same without...FAMILY." 

We had a quiet Easter this past weekend and missed being with all of our relatives, so I had to scrap this photo of all of the Flanders from last Easter. Funny how photos mean so much more to you after some time and things have changed, isn't it?
The photo was printed on a 4x6" photo paper, but the actual photo is 3.5 x 3.5", so I'd have room on the end of the photo paper to trim the corners off and turn it into a tag to match the tag from the Twirly Girly line.
Stop by the Chickaniddy Crafts blog for a full supply list and more details. And be sure to check out all of Chickaniddy Crafts' products!! Thank you, Heidi and Pam, for having me as a guest this month! xo

Wednesday, April 16, 2014

Inspired by a card sketch...

With just a few supplies, you can make a layered card like this that looks like you spent a ton of time on it. Working with a particular collection from a scrapbooking manufacturer really helps make the process quick, because everything coordinates in the line. For example, this Twirly Girly line by Chickaniddy Crafts...
All you need to make a card is a few items that coordinate to create a background and a focal point, and it was so easy to find pieces I loved in this collection!

Stop over to the Chickaniddy Crafts blog to read more about how their card sketch inspired the little bits and pieces I chose for this project. Thanks for reading today! Come by again soon!

Tuesday, April 15, 2014

Release day: April...

Papertrey Ink is releasing all of its new products this month on April 15th at 10 pm EST. We're back to show you a few more new things coming out! This card was made with The A-mazing Stamp Set. I did something unconventional with it...used the die as a nest instead of a maze! And the sentiment from The A-mazing Stamp Set went perfectly with the bird/nest idea too!

The Classic Kraft cardstock was painted with white acrylic paint to make it rustic looking, then I stamped some branches from Peaceful Pinecones in Dark Chocolate ink. The little bird is from Happy Trails. The felt button was cut with Button Stacks II.
To create the nest, I die cut the maze, but didn't pull it apart. I left it tucked together and bent up the edges. Then pop dots were used all underneath the edges to help hold it up a bit!


Hurry Home Soon card:
STAMPS: The A-mazing Stamp Set, Peaceful Pinecones, Happy Trails
INK: Simply Chartreuse, Dark Chocolate,
PAPER: Rustic Cream, Classic Kraft and Stampers Select White cardstock
DIES: A-mazing dies, Happy Trails dies, Button Stacks II
OTHER: white acrylic paint- craft supply, Fresh Snow felt, Rustic Twine, chipboard - Cosmo Cricket Tea for Two.
______

"Hello, Friend" is made with the new Phrase Play #3 stamps and dies. I also added a stamped background with Background Basics: Text Style.
The Phrase Play #3 die cut was trimmed down, and I kept the top portion of it and adhered  it over a paper from my stash.

Hello Friend card: 
STAMPS: Phrase Play #3, Background Basics: Text Style
INK: Pure Poppy, True Black
PAPER: Cream, white, gray polka dot - Pebbles (Front Porch)
DIES: Phrase Play #3
OTHER: chipboard - Cosmo Cricket (Tea for Two), journaling card - American Crafts (Love).
______

This is the new Wet Paint II stamp set. I also cut the background with the new Simply Framed die. Just one cut, and I kept the center piece and the outer ring - just popped up the center with pop dots. I love how it fits perfectly together with the frame around it!


Love You card:
STAMPS: Wet Paint II
INK: True Black by PTI, Soft Granite by Hero Arts
PAPER: Pebbles (Front Porch)

DIES: Simply Framed
OTHER: chipboard - Cosmo Cricket (Tea for Two), thread.
______

These are done with Botanical Blocks. I heat embossed the outlines in white first and then painted them in with watercolors, along with the backgrounds to match.
They're so much fun to color in with any type of medium! 


Botanical cards:
STAMPS: Botanical Blocks
INK: True Black, Versamark
PAPER: watercolor paper - craft supply
DIES: none
OTHER: watercolor paints, twine.
______

Next is Teepee Time. I went crazy with the arrows in this set! 

On the first card, I stamped onto patterned paper to create my own design and added a sentiment from Birthday Classics: May. 
On the second card, I stamped a little quilt design with the Teepee Time arrows and added a label in the center from Initial Thoughts stamps and die.
Teepee Time cards:
STAMPS: Teepee Time, Birthday Classics: May, Initial Thoughts
INK: True Black, Tropical Teal, Aqua Mist, Summer Sunrise, Melon Berry, Raspberry Fizz by PTI. Soft Granite by Hero Arts
PAPER: white, Soft Stone, Harvest Gold, Aqua Mist
DIES: Initial Thoughts
OTHER: twine.
______

This stamp set is Modern Cross Quilt and I also used Phrase Play #3. I backed the Cover Plate: Modern Cross Quilt die with Aqua Mist cardstock, then just filled in a few of the crosses with color to highlight the sentiment in the center!

Hello I Miss You card:
STAMPS: Modern Cross Quilt, Phrase Play #3
INK: Tropical Teal, Summer Sunrise, Raspberry Fizz
PAPER: White and Aqua Mist cardstock, Enchanted Evening Pattern Pack
DIES: Phrase Play #3, Cover Plate: Modern Cross Quilt
OTHER: Chipboard stars by Studio Calico.
______

This one is stamped with Simply Framed (stripe), Monthly Moments: April (umbrella), Phrase Play #3 (little one and stars). 
The buttons were cut with the new Button Stacks II die. 
Hello Little One card:
STAMPS: Monthly Moments: April, Simply Framed, Phrase Play #3
INK: Harvest Gold, Sweet Blush, Raspberry Fizz by PTI, Soft Stone by Hero Arts
PAPER: White, Harvest Gold, Raspberry Fizz cardstock. Sweet Blush Pattern Pack. Gray dot by Pebbles.
DIES: Phrase Play #3, Button Stacks II, Filigree Border die
OTHER: Chipboard stars by Studio Calico, seam binding by Zipperstop, white felt by PTI.

______

This last one is made with Football Frenzy and Background Basics: Random Stripes. I used the small stripe in the set and stamped it three times, first in Enchanted Evening ink at the top, then Blueberry Sky ink, then Spring Rain. The football is popped up. Masculine = simple. Right? :) I tried, people...I tried.
Happy Birthday, Champ card:
STAMPS: Football Frenzy, Background Basics: Random Stripes
INK: Classic Kraft, Dark Chocolate, Enchanted Evening, Blueberry Sky, Spring Rain
PAPER: White, Enchanted Evening, Classic Kraft
DIES: Football Frenzy
OTHER: gold star by Studio Calico.
______

Everything will be available tonight at 10 pm EST at www.papertreyink.com!
Visit the rest of the PTI team to see more with these products:

Monday, April 14, 2014

Desktop Design...

The Papertrey Ink team is back again today with a couple of new things to show you that will be released this month on the 15th, the Desktop Design stamps and dies! My favorite thing about this set is this adorable little typewriter. It actually has a tiny piece of paper that you can stamp a saying on and slide into the slot! So cute!


I stamped the background with this set also. Kept this one a little bit on the simpler side with just a small focal point in the center.
 Thank You card:
STAMPS: Desktop Design
INK: Tropical Teal, True Black, Pure Poppy, Summer Sunrise, New Leaf, Aqua Mist by Papertrey Ink, and Soft Granite by Hero Arts
PAPER: white
DIES: Desktop Design
OTHER: none.
______

On the next card, I added a few more steps with die cutting the desk and changing out the sentiment.
You know how when you were younger, the teacher would stamp little sayings in red on your paper? I tried to recreate that look by stamping the "teacher" in red ink on the background notebook paper that I made. :)
 Teacher, Happy Birthday card:
STAMPS: Desktop Design
INK: Tropical Teal, True Black, Pure Poppy, Summer Sunrise, New Leaf, Aqua Mist by Papertrey Ink, and Soft Granite by Hero Arts
PAPER: white, Aqua Mist by PTI, red polka dot by Crate Paper
DIES: Desktop Design
OTHER: chipboard stars - Studio Calico.
______

This stamp set will work for secretaries, bosses, co-workers, friends, miss you cards, and hello cards as well as teacher cards! Visit the rest of the PTI team to see more with Desktop Design:

Sunday, April 13, 2014

Monthly Moments: April...

Hi! I'm back to share a few of the new Monthly Moments products for April and a couple other new things coming out on the 15th at Papertrey Ink. First up, a layout that was inspired by the umbrellas in the Monthly Moments: April stamp set!

I was looking for April pictures and found this fun pic of my girls in April of 2009. It cracks me up! The journaling tells about what I see in this photo, very indicative of their relationship...Taylor's humor and poor Kati has to deal with it. Ha. Sibling love.

Under the photo, I added a pocket to hold more pics. (I completely forgot to insert the extra photos in the pocket before I took the pics of my layout- sorry!) It's cut with the Monthly Moments: Journal Pocket 1. I have a series of cute pics from this day I want to tuck inside.

I was in the mood to paint something to add to my layout, so I painted some raindrops with watercolors on a scrap piece of paper, painting them darker at the top, making them smaller and lighter as I painted down. When dry, I printed my journaling over the top and trimmed it down to fit on my page.

The "hello" and arrow were cut with the new Phrase Play #3 die and the big words were stamped with the new Wet Paint II stamp set. The sayings in the Wet Paint II set are perfect for layouts and pocket pages! I used a couple of the yellow journaling cards from the April Monthly Moments kit, and the new Cover Plate: Modern Cross Quilt in white (under the hello). "Remember This" and the umbrellas and rain drops are from the Monthly Moments: April stamps.

Hello layout:
(All supplies by Papertrey Ink unless otherwise noted.)
STAMPS: Monthly Moments: April, Wet Paint II, Simply Framed
INK: True Black, Raspberry Fizz, Summer Sunrise, Lavender Moon
PAPER: Stampers Select White and Classic Kraft cardstock, Monthly Moments: April journaling cards
DIES: Cover Plate: Modern Cross Quilt, Phrase Play #3 Simply Framed, Monthly Moments: Journal Pocket 1
OTHER: twine by PTI, wooden stars by Studio Calico, washi tape.
______

Here I've stamped some one-layer pocket cards that you could use in your scrapbooking/pocket pages! The "remember this" is from the Monthly Moments: April stamp set, and I left lines to write journaling or important dates and notes in between the colors. The "&" is from the Simply Framed set and the umbrellas and sentiment were stamped with the Monthly Moments: April set. This is a super fast and easy way to dress up your pocket pages in between the photos!

April 3" x 4" pocket page cards:
(All supplies by Papertrey Ink unless otherwise noted.)
STAMPS: Simply Framed, Monthly Moments: April
INK: Melon Berry, Hawaiian Shores, Harvest Gold, Pure Poppy, Summer Sunrise, Tropical Teal, Aqua Mist, Spring Rain, Raspberry Fizz, Aqua Mist - all by PTI. Soft Granite by Hero Arts.
PAPER: Stampers Select White
DIES: none
OTHER: none.
______

Visit Heather Nichols, Melissa Phillips and Ashley Newell for more Monthly Moments inspiration for April! Thanks for visiting me today. Hope you are having a great weekend!

Saturday, April 12, 2014

Simple Stars...

Our first group post for Papertrey Ink this month is with a new stamp set called Simple Stars! 

These stamps make it so easy to add color and pattern to any project. I've also used a new die called Cover Plate: Stars. All of these new products will be available on April 15th at 10pm EST.
On the first card, I die cut the cover plate from Rustic White cardstock, then backed it with a piece of Hawaiian Shores cardstock. Then I stamped a few of the little stars that fell out of the cover plate and tucked them back in. The larger ones are stamped with the Simple Stars stamps.d


Last, the card front is added to a Summer Sunrise card base. I love adding another color to the card with a different cardstock base.


I've been stamping with a couple of friends here in Colorado, and one thing they told me was that they were surprised by how I just create a card front and later add it to a base. Do you do this? Or do you create a whole card and then stamp directly on the front of that? The reason I do this is because I make a lot of mistakes, and it's just easier for me to adhere the card front later when I'm done. If I mess up, I can toss it and start over with just a front and not ruin the entire card. Plus it's fun to add more color to the inside of the card!

Stars Shine Brightest card:
(All supplies by Papertrey Ink unless otherwise noted.)
STAMPS: Simple Stars
INK: True Black, Pure Poppy, Raspberry Fizz, Summer Sunrise, Hawaiian Shores
PAPER: Rustic White, Hawaiian Shores
DIES: Cover Plate: Stars
OTHER: seam binding - Zipperstop, wooden stars - Studio Calico.
______

This one was intended to be a little more masculine, although I'm not sure how good of a job I did on that! Masculine is so hard for me! I trimmed the Cover Plate: Stars again from Enchanted Evening patterned paper and trimmed it down a bit. I backed it with Tropical Teal cardstock, then added a saying from Simple Stars over the top on Hawaiian Shores cardstock with Tropical Teal ink.
Then I felt like it needed one more color to brighten it, so I added a bit of purple.
The wooden stars are by Studio Calico and a stamped star was added as a focal point from Simple Stars in Lavender Moon ink.

Entire Night Sky card:
(All supplies by Papertrey Ink unless otherwise noted.)
STAMPS: Simple Stars
INK: Tropical Teal, Lavender Moon
PAPER: Tropical Teal, Hawaiian Shores, Aqua Mist cardstock, Enchanted Evening Pattern Pack
DIES: Cover Plate: Stars
OTHER: wooden stars - Studio Calico, twine - The Twinery, sewing machine thread.
______

Visit the rest of the PTI team to see more with these products: